Session 7
Map publication
If your project is not on screen anymore, please open it (‘My first map –session 6), go to the PROJECT header and save this project as: ‘My first map-session 7’
11 TEMPLATES
We will now focus on the layout of the map we want to publish. When we click on the Page tab we see that the interface changes colour.
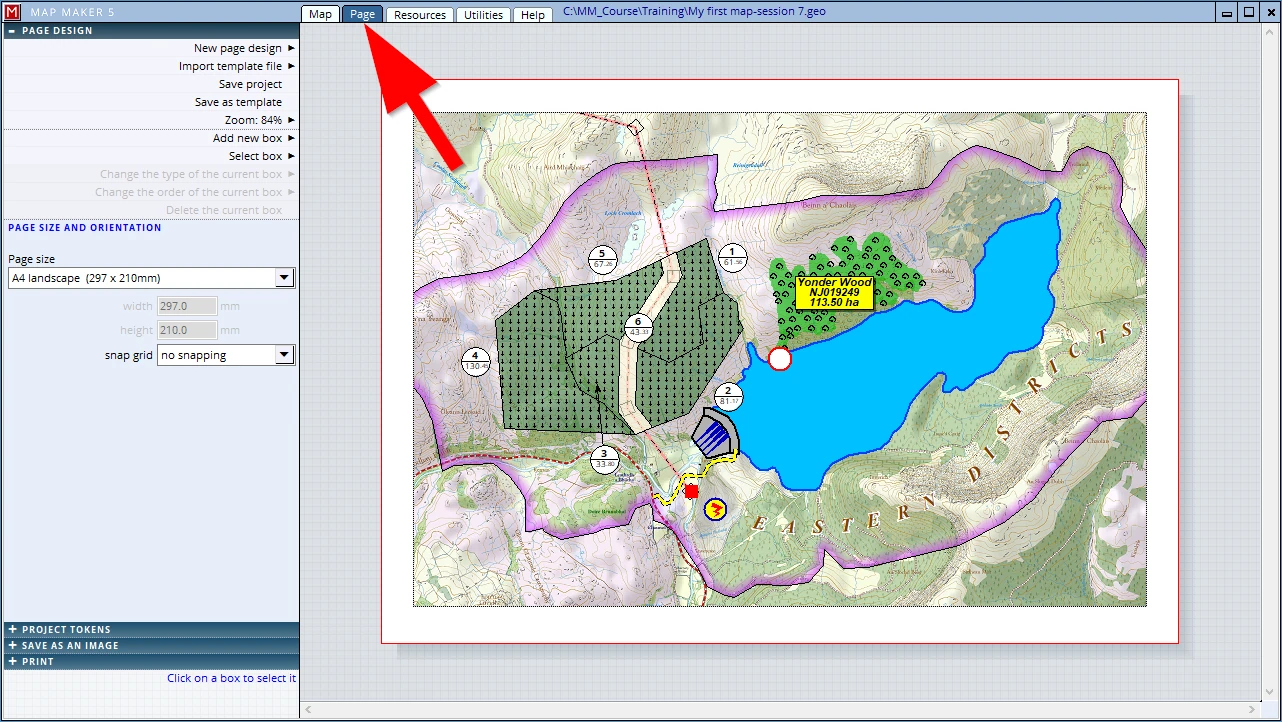
We are looking at a so-called ‘Template’. It is a page layout which we can change and enhance, showing more components (e.g. a scale bar, north arrow etc.). It is called a ‘template’, because, as the name suggests, we can design a page layout, save it and re-use it in other maps. This is of course most helpful.
It is not only a great time saver (we do not have to design a page for every jolly map we make), it also improves the quality of our business’ output – using a standard design for all map productions. When we include company logos and detail etc. it will look hugely professional (mmm, well, it is professional!).
And because of these two reasons, it is time well spent to master the options given.
11.1 General introduction
Here too all the options are presented in headers, and we can see the first header is opened. If we were to click on it, it hides all these specific options and we only see the main headers:
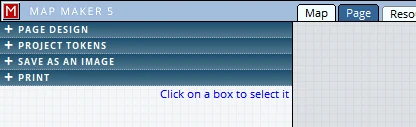
The Page view opened on the PAGE DESIGN header
We will ignore the PROJECT TOKENS (it is particularly useful for structured users, complex multiple map productions and larger organisations.)
The option: SAVE AS AN IMAGE sounds good (and is good) and we will explore that below.
The last header: PRINT does exactly what it says it will do – with a good range of options.
Just like the header functionality in the Map view, as soon as one header is opened, it will push the others which are below it, further down.
Please, go back to the Map view, centre the project area on screen and change the scale to 1:30,000
When we open a header we will see more specific options we can use to adjust the layout of our map.
For example:
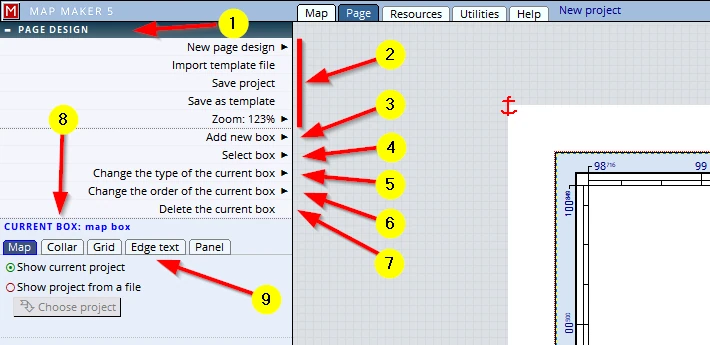
(1) Open the PAGE DESIGN header:
(2) The first section deals with the entire template:
- creating a new one,
- importing an existing one,
- we can save the project here as well (because the template is saved part and parcel in the project file)
- we can save the template as a separate file
- and to adjust the layout to perfection we can change the zoom factor to zoom in and out on the page.
(3) We can add layout components (such as a scale bar or north arrow). These live in ‘boxes’, here we can see we can Add a new box
(4) Our layout can become quite complex with multiple boxes, some living on top of several others. For that reason this ‘Select box’ option is very handy. So we either select a specific box by clicking in it. Or we use this option to select it.
(5) Sometimes we want to change the content of a box, after we have taken great care in adjusting its appearance.
(6) As mentioned, with complex layouts, several boxes could live on top of one another, and sometimes we need to shuffle the sequence of this stack to get a specific visual effect (just like working with layers).
(7) Naturally we may want to delete a specific (selected) box as well.
(8) Once a box is selected, the interface below this section will change to show more specific options.
(9) In line with the rest of the interface, here too we can find headers which offer even more options – if we want and need them.
Every new project starts with an A4 Landscape page. Note: strictly speaking, a new page takes the paper size currently set for your printer, which in most cases is A4. We can change this to any paper size we want. By default it opens showing the main map box with a coordinated corner.
Each new component box we add, comes in at the centre of the screen. We then need to resize, position and adjust its appearance.
We will introduce and edit most of the options available in this session.
11.2 Paper size
For our map we want an informative page design. We want to show the usual suspects: a company logo; contact details; a scale bar; a north arrow; a map title etc. And also, the entire site, at this scale does not fit this page. We can change the scale, but then all becomes a bit too small for our purposes.
We want our map to make an impact on the folk who read it, so instead of scaling it down to fit an A4 page we will change the paper size to A3. You may not have an A3 printer, but bear with us, that is no problem. So let’s start with the paper size:
To change the paper size, click anywhere in the grey space outside the paper, or anywhere in the white margin.
(1) The interface will change, dealing with PAGE SIZE AND ORIENTATION
(2) Click on the little black arrow
(3) Select A3 landscape
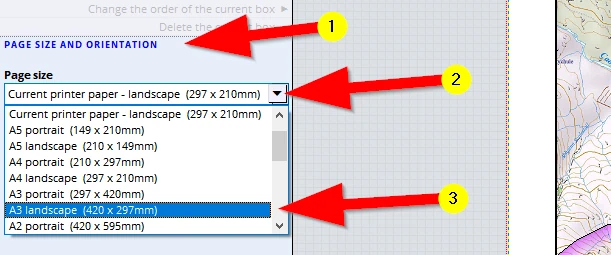
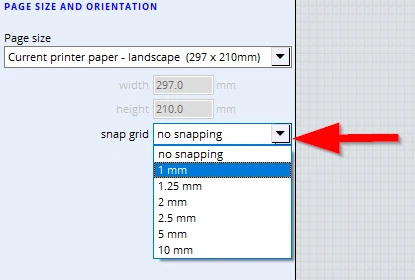
In this menu (see arrow below), we can also set an option which deals with positioning the map furniture boxes. We can move furniture boxes freely to any location, but, when we set this option, when dragging a box to a new location, it will ‘snap’ to a set grid. This is helpful to align boxes.
F1 to Save this change.
11.3 Map & collar
Although in the first stage of making our map we had changed the map collar to show a single black line, we now have changed our mind - we do want to show the coordinated border.
Click once in the map collar box and note …
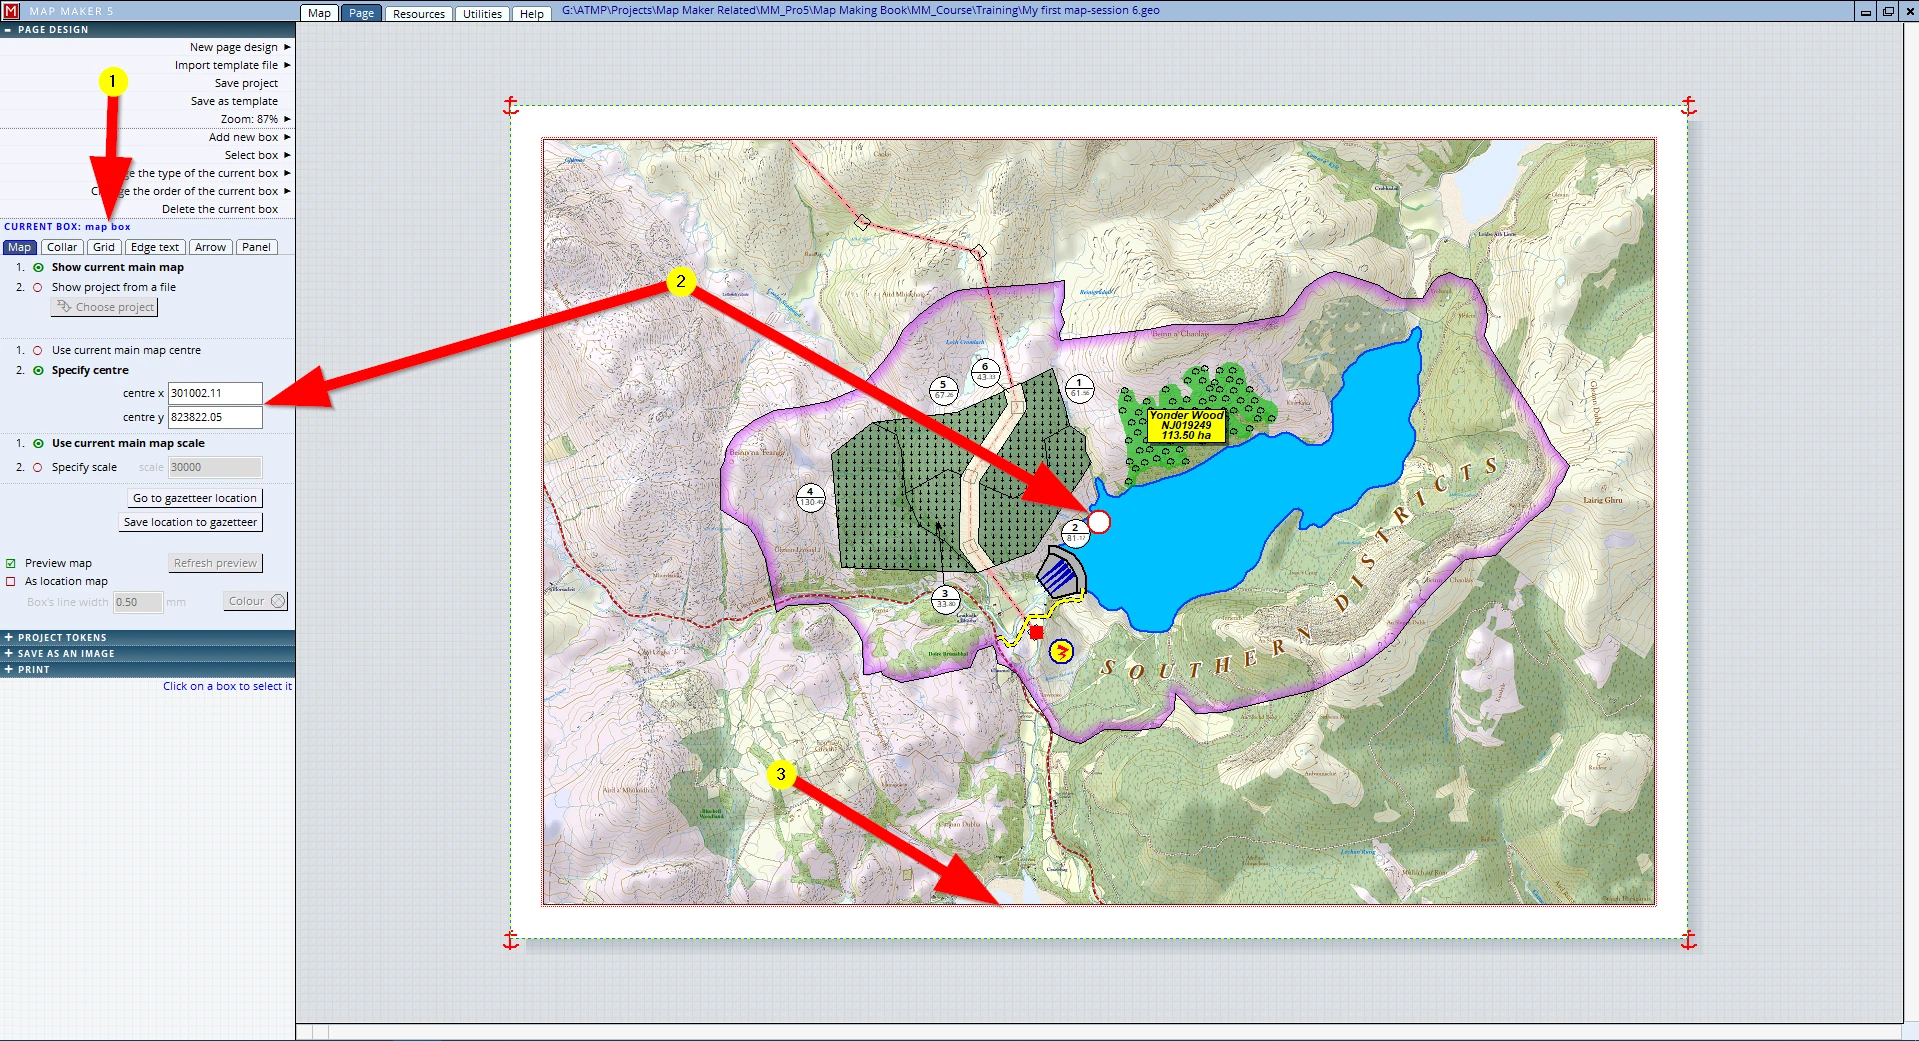
(1) …that the interface changed to show settings dealing with the CURRENT BOX: map box
This menu deals specifically with settings related to the map collar box. Have a look at the different tabs to see what they do, we will explain those in more detail later.
(2) As explained, the white dot in the centre of the map allows us to drag and pan the map, but in this section you can also type in specific coordinates or change the scale.
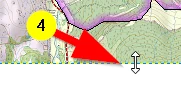
(3) To resize a furniture box, hover your mouse over an edge – two little arrows will show
(4) Click, hold and drag it to change the width or height
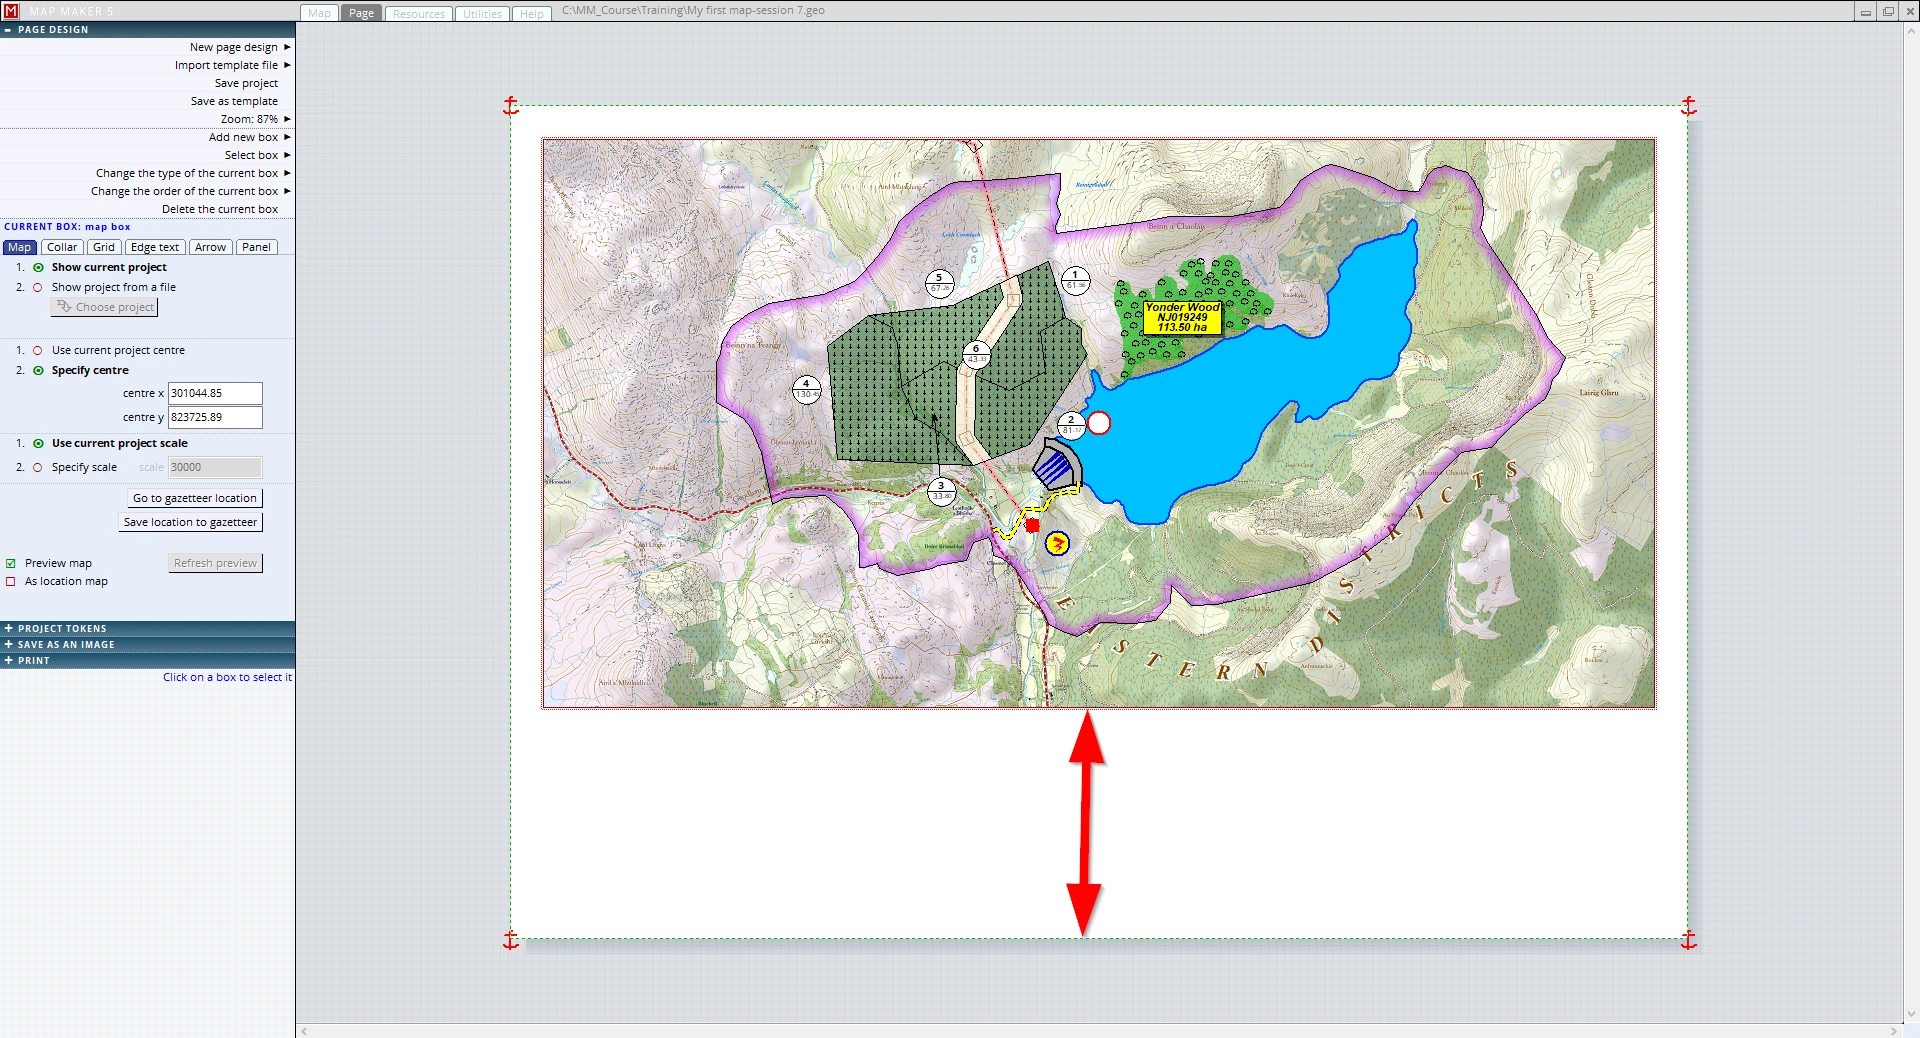
Drag the bottom edge upwards to create room for the additional panels we want to include.
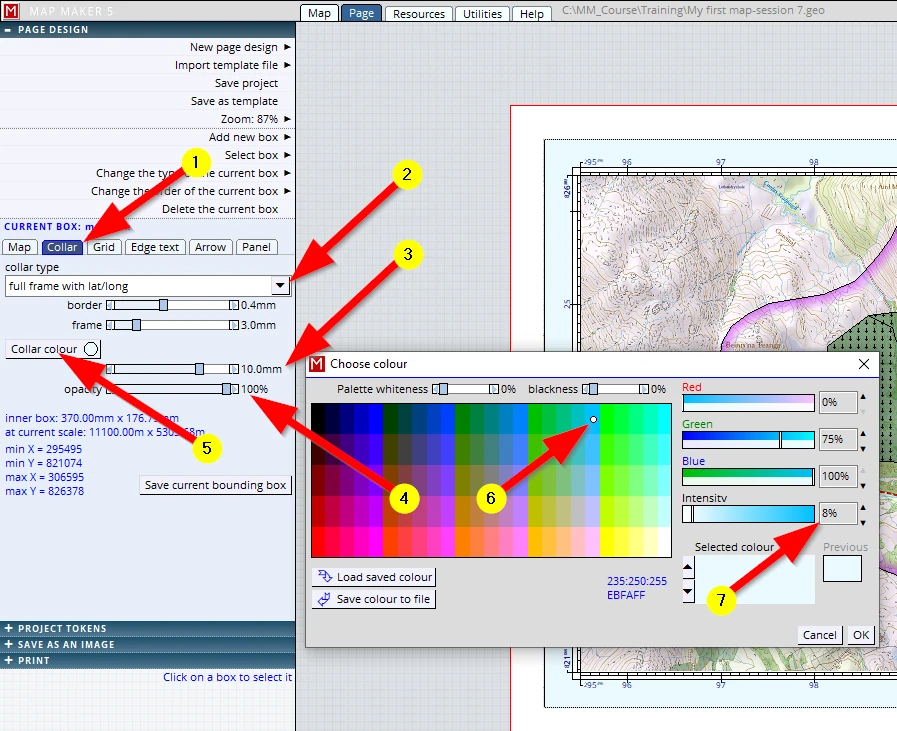
To change the collar type we do the following:
(1) Click on the Collar tab
(2) Change the collar type to full frame with lat/long
(3) Change the collar width to 10 mm (use the slider or click on the value and type in)
(4) The collar is currently transparent, which we do not like. We will set the opacity to 100%.
Because we changed this opacity, the default colour blue becomes quite prominent and is a colour we do not like. We can change this by …
(5) …clicking on the Collar colour button.
(6) We can choose any colour we like. If your company or organisation has a particular prominent colour in their house-style, choose such a colour. (Foresters often have green!) But whatever colour you choose, the colour should be subtle and not be too prominent. For this reason we have chosen a light blue...
(7) ...and toned it further down with the Intensity slider to 8%
11.4 North arrow
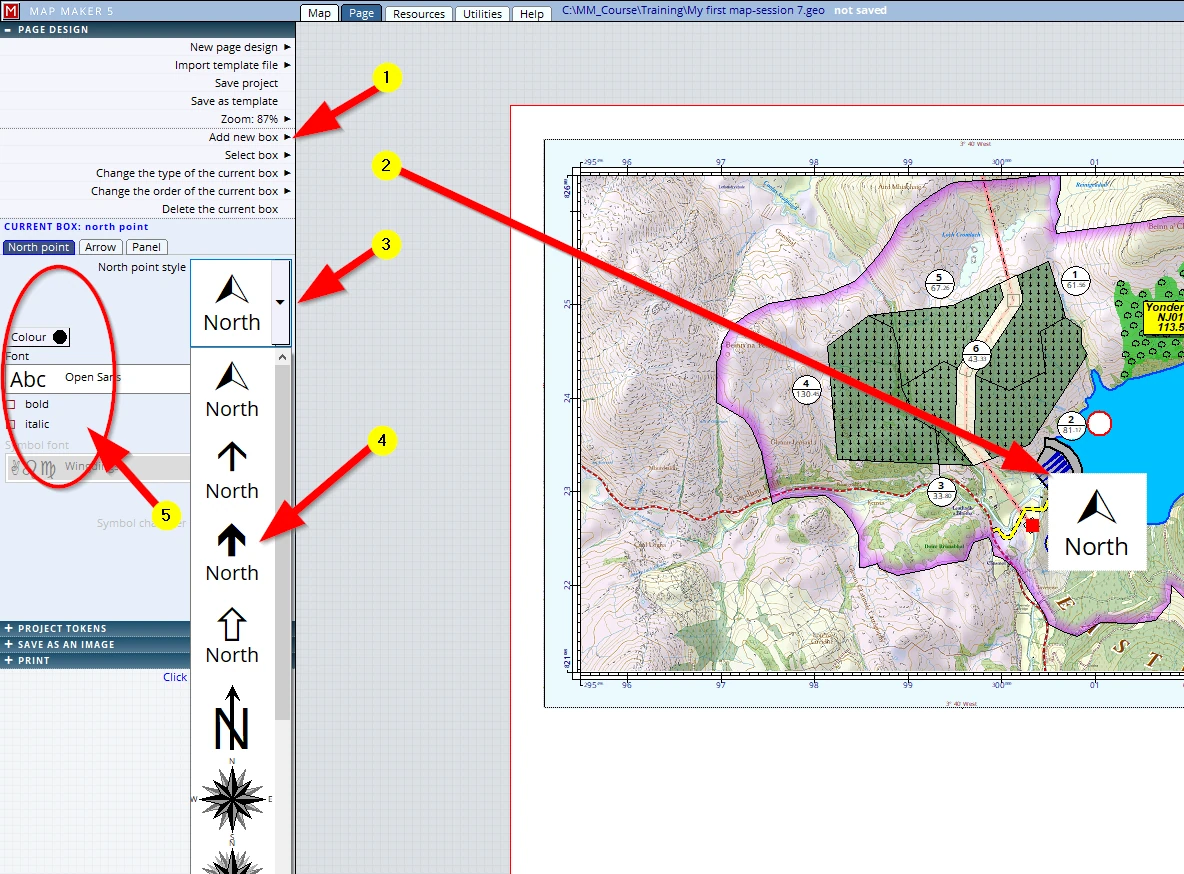
We will now start adding new map furniture boxes and will start by adding a North arrow:
(1) Click on Add a new box, and select north arrow
(2) All newly added boxes always open up by default in the centre of your layout, for you to resize and move to your preferred location.
(3) Click on the little arrow next to the North point style.
(4) More style options are shown, slide the slider down to see more. The very last one in this list allows us to select a font character (often used to show a ‘Wingdings’ font character).
(5) Colour and font settings for the word ‘North’ can also be changed.
We want to adjust our North arrow a tad smaller and move it to the top left corner of the map.
- To move it into the corner click in the panel, hold and drag it.
- To resize it, hover the mouse over the edge of this panel until the cursor change to show the resize arrows, we can now click, hold & drag this edge to the size we want.
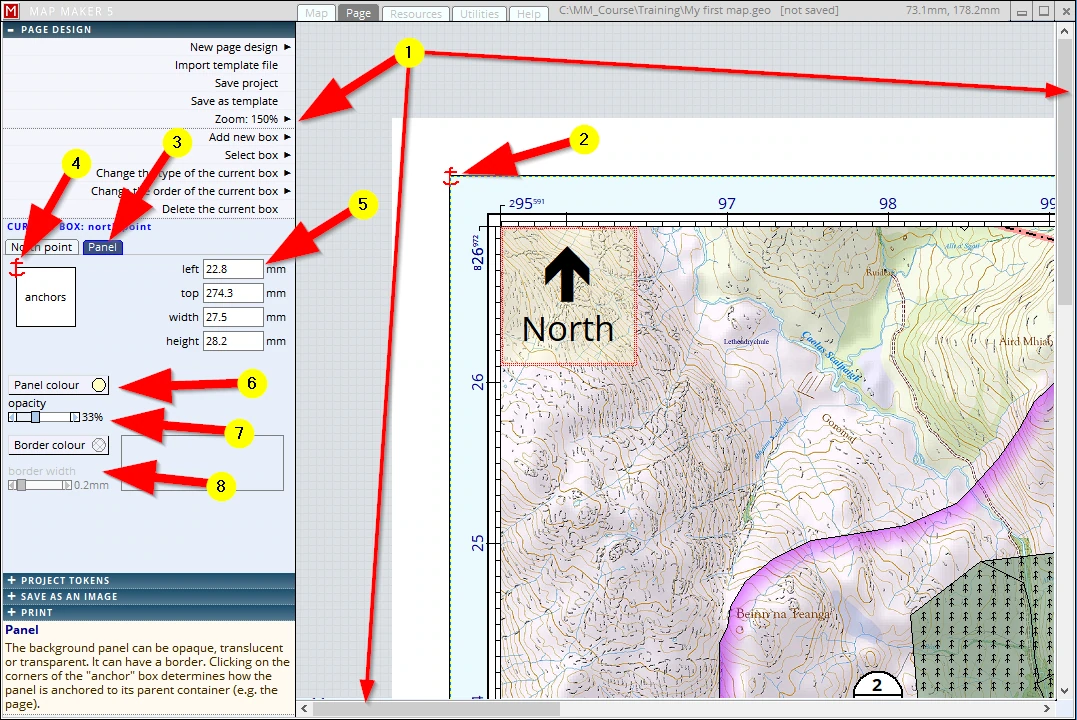
(1) We have resized and moved the North arrow panel into the top left corner of the map collar. To inspect the alignment of panels in detail, we can zoom in using the pre-set zoom settings. Once zoomed in we can move the screen using the scroll bars on the right side and bottom
(2) Because of the move a little ‘anchor’ is now shown in the corner of the map collar. Each new box is either anchored to the top left of the page, or to the top left of another box it is moved into
(3) Please, click on the Panel tab
(4) The same anchor is also shown in this diagram:
- it indicates which corner of this panel is used to anchor it, whereas the anchor in the map view shows where it is fixed. In this scenario, the North arrow is in the map collar box and is anchored to the top left of that box. This means that if we were to move the map collar box, the North arrow will move as well.
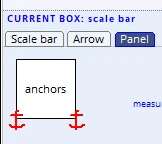
- When we click on any of the other corners of this diagram, another anchor will become effective. This means that this panel will stretch in proportion if its ‘mother box’ is resized.
- Click on that anchor again and it will be removed.
- Position the anchor points with consideration since it can save a lot of time when resizing the page.
(5) Moving and positioning these panels by dragging them into place works fast and efficiently. For larger
organisations and those striving for perfection the dimensions and locations can also be governed by typing in specific values.
(6) The default panel comes in with a white opaque colour - we will change the colour to a very light yellow
(7) and we will move the next slider, opacity to 33%
(8) By default there is no border colour set and so currently it is invisible. Once we select a colour we can also change the border width.
Knowing the basic principles of these map furniture boxes, we will now introduce some more boxes!
11.5 Scale bar
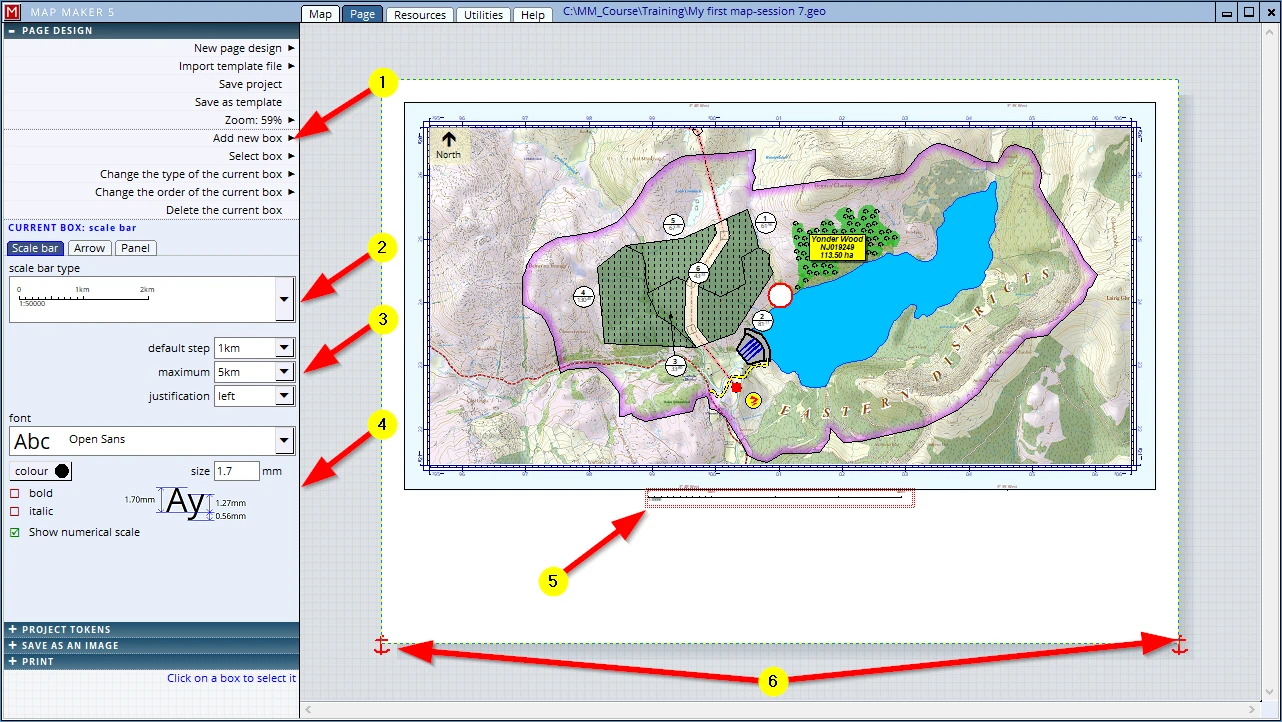
(1) Add new box
Select: scale bar
A scale bar will appear in the centre of the layout and the interface will change.
(2) Select a type you like
(3) Adjust these settings to your liking.
(4) Adjust the font setting if you want, and opt to show/not show the scale call-out
(5) We will drag the scale bar box under the map collar
(6) Note the two anchor points (which can be set in the Panel tab, bottom left and right)
F1 to save the project
11.6 Text (title)
Most maps will have a title:
Add new box, Select: Text
The interface changes to this:
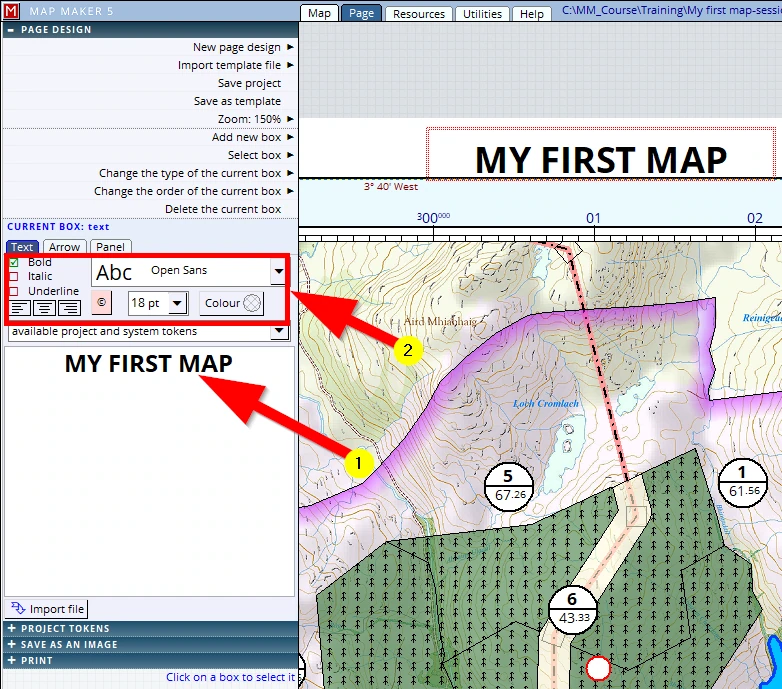
(1) Fill in a map title and select the entire text to be able to...
(2) …change the font size, change font, colour and bold/italics if you want
Note the option: available project and system tokens is extremely useful, particularly for complex map productions and those working in a very structured environment (i.e. larger organisations). For now we will only use some basic tokens (see sessions below)
Move the panel to the top of the map and adjust the width and height of the box. In the Panel tab, make good use of these chaps:
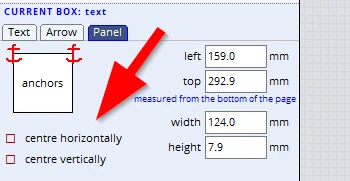
Also in the Panel tab, ensure you anchor it to the top left and top right, and set the opacity to 0% (so that the placement is less critical, otherwise it might overlap with the blue collar).

F1 to save the project.
11.7 Tokens (scale & map centre)
Although we have a scale bar, it is good practice to also spell it out. We will add another text box.
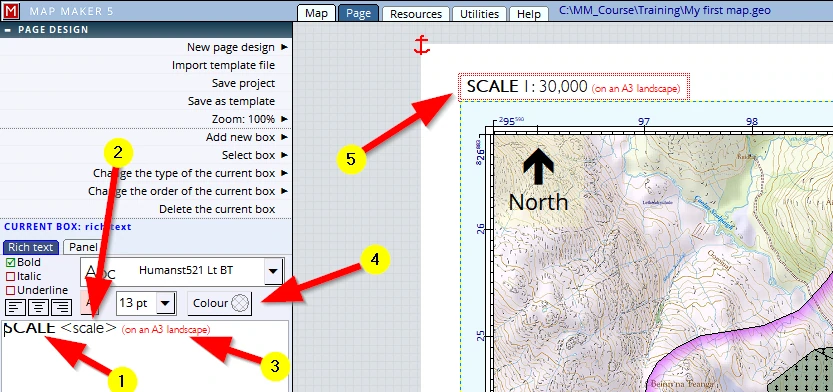
(1) Please type in exactly the following: SCALE (in bold and a large font (e.g. 13pt)
(2) type in: <scale> (use the angled brackets). Select the text and make sure it is not bold
(3) type in: (on an A3 landscape) select it and change it to a small font (e.g. 8pt) and
(4) make it red so that it looks like this: (on an A3 landscape)
(5) resize the panel and move it to the top left (and note the anchor point: top left)
The text with the ANGLED bracket (<scale>) is a so-called ‘Token’. Such tokens will be automatically replaced by other information associated with it – in this case it will automatically show the exact screen scale so that the user does not have to change this when a different scale is chosen.
We will apply another text box and type up another ‘Token’: one which will automatically give the National Grid references for the map centre.
Anyone who can read maps will be able to find the location of this map because of the coordinates shown in the map collar. We want this to be fool-proof, so we shall spell out the map centre coordinates. (And we will even insert a tiny location plan, see below). Since we are in the UK, we will use the commonly used abbreviated ‘OS grid reference’. There is no need to work out the exact centre, MM5 will do that for us!
Add a new text box and type in: MAP CENTRE: (select it, and change the font size and colour to match that used for the ‘SCALE’ caption.
Behind it, type exactly this: <OS8> (use the angled brackets again). Select it, and change the font size and colour to match that used for the <scale> token. Scale the panel and move it to the top right corner. Because it will be in the top right corner, we need to change the text justification to the right. And in the Panel tab we will make sure it is anchored to the top right. Again, in the panel tab, change the opacity to 0%.
It should look like this:

F1 to save the project.
11.8 Edge text
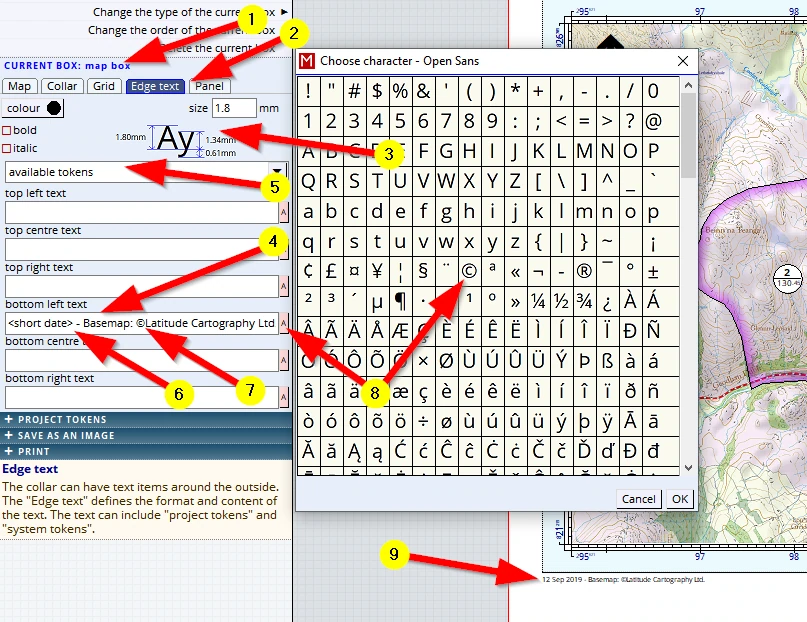
Most maps will need a copyright statement. This can be quite small but must be present. We will slot it in on the left, below the map. To do so we need to ...
(1) Click in the main map panel and check the interface is assuring us we are dealing with the right box
(2) Click on the tab Edge text
(3) We need to change the usual font settings to something we like (we’ll go for 1.8mm in black)
(4) Click in the entry field dealing with ‘bottom left text’. We can type in any information we like but...
(5) now that the cursor is in this field we can click on the option available tokens. And here we see a list of pre-cooked, automatic tokens. (Note: we also see the <scale> and <OS8> tokens which we have used (manually) in our last section.) We select: <short date>
(6) we then continue by typing in the rest: ‘Base-map: …’
(7) We want to insert that special copyright character (©) and finding it in Windows is a thing to know…… (Start, Scroll down Programs, Windows Accessories, Character Map). ...and so…MM5 helps out:
(8) a click on the ‘A’ will list the character set of the current active font (which we could have set in the Grid tab). Behind that, type in the company name: Latitude Cartography
(9) The text should now appear in the bottom left.
F1 to save the project.
11.9 Images
Now we will insert a company logo:
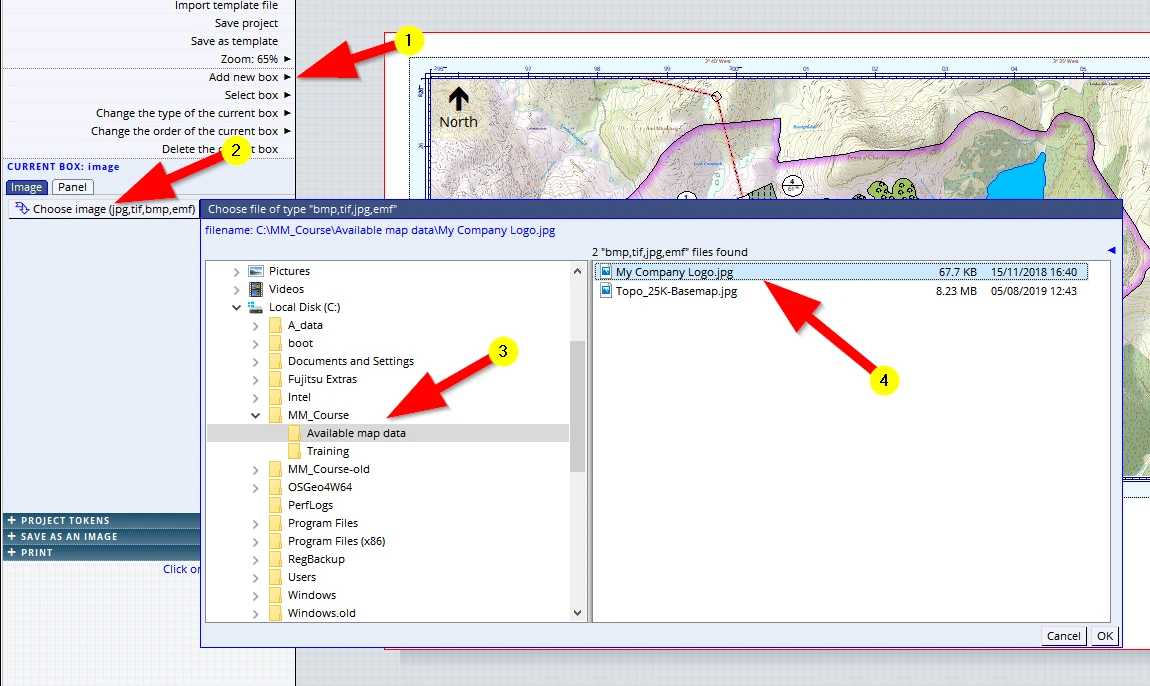
(1) Add new box, select image and the interface will change to deal with this type,
(2) click on the button Choose image
(3) Browse for this folder... C:\MM_Course\Available map data\
(4) and select: ‘My Company Logo’
Note: Naturally you can select your own logo as well (provided it is a file format: jpg, tif, bmp or emf).
Of course we want our company contact details to show. Because we often need these and we don’t want to type these details again and again we have created a document which we will now insert:
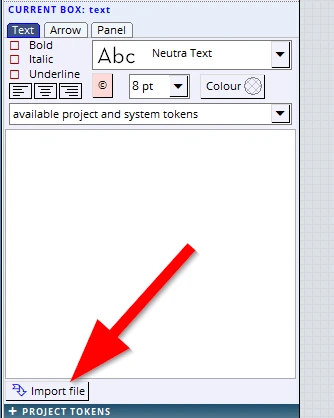
Add new box, Select: Document
Click on the button “Choose Document(doc, docx,rtf)”
Browse for and select:
C:\MM_Course\Available map data\ Company Details.rtf
The panel appears at the centre of the screen and we will drag and resize it so that by now our map looks like this:
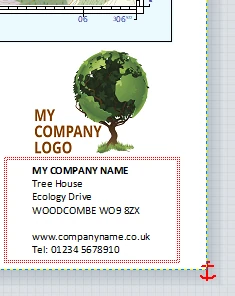
Anchor both these panels to the bottom right.
F1 to save the project.
We have a site photo which must also be shown on the map:
Add a new box: image.
In the menu on the left: Choose Image and from our available map data folder select ‘Site Photo.jpg
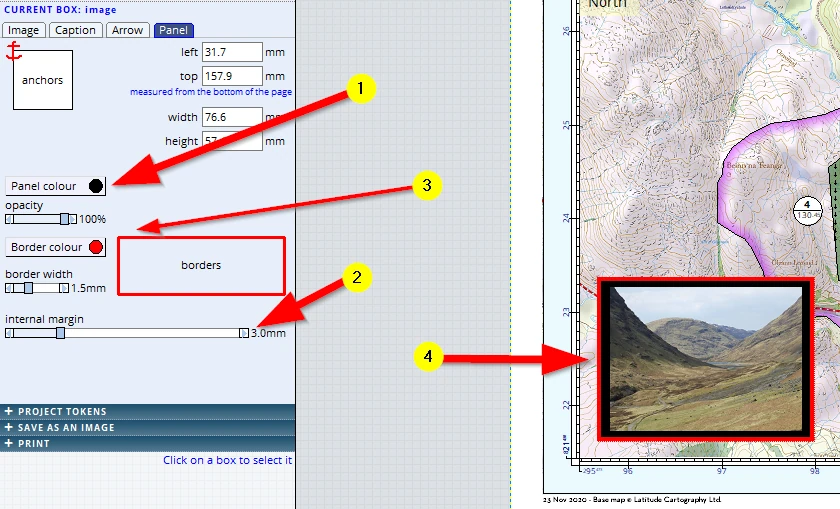
Go to the Panel tab and
(1) Assign a black colour to the panel
(2) Change the internal margin to 3.0mm
(3) Change the border colour to red and width to 1.5mm
(4) Resize the box and place it in this corner
Then:
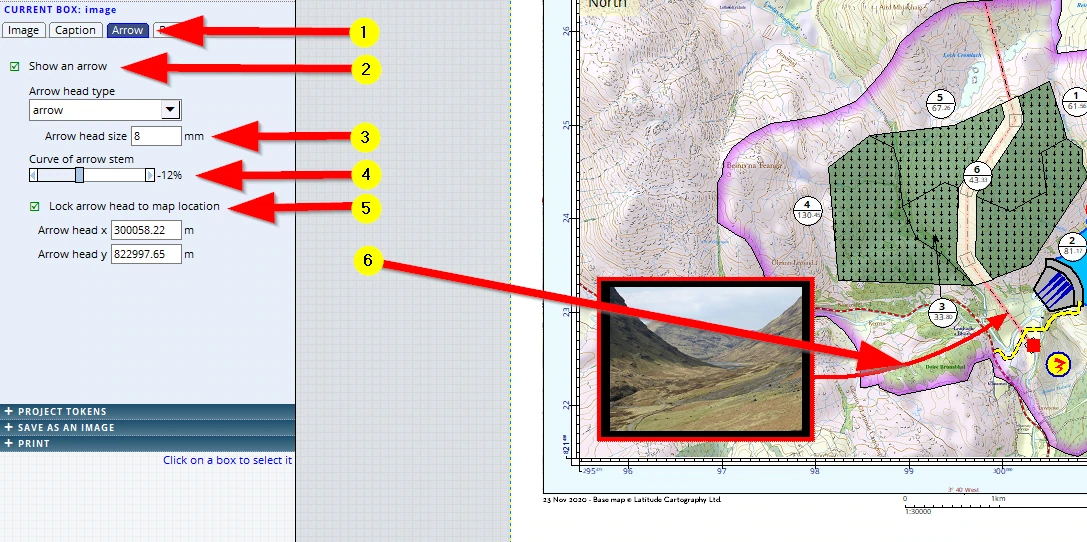
(1) Activate the Arrow tab
(2) Tick the box Show arrow
(3) Change the Arrow head size to 8mm
(4) Change the Curve of arrow stem to -12%
(5) Tick the box: Lock arrow head to map location. Note: we can even specify an exact coordinate!
(6) Note that we can now drag the image to other locations whilst the arrow head remains fixed to the map location.
Note: We gave the panel a black background and internal margin just for practice. And on that note, why not try the Caption tab and type in credentials in a yellow font?
F1 to save these additions to our project!
11.10 Document
Some maps need quite a lot of informative text to share additional information. Such texts can have an intricate layout of tabulations, graphs, supporting images etc. And that is a lot of work to do in the ‘simple’ text editors we have used so far.
For these situations MM5 allows us to introduce an entire MS Word document (*.doc or *.docx). After all, software packages like MS Word are the tools to deal with texts and text formatting.
Add a new document box:
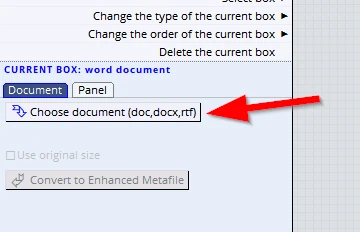
The interface on the left changed, click on the button Choose document (doc,docx,rtf):
Browse to and select: ... a ‘one we made earlier’, example...:
C:\MM_Course\Available map data\ SITE ANALYSES.docx
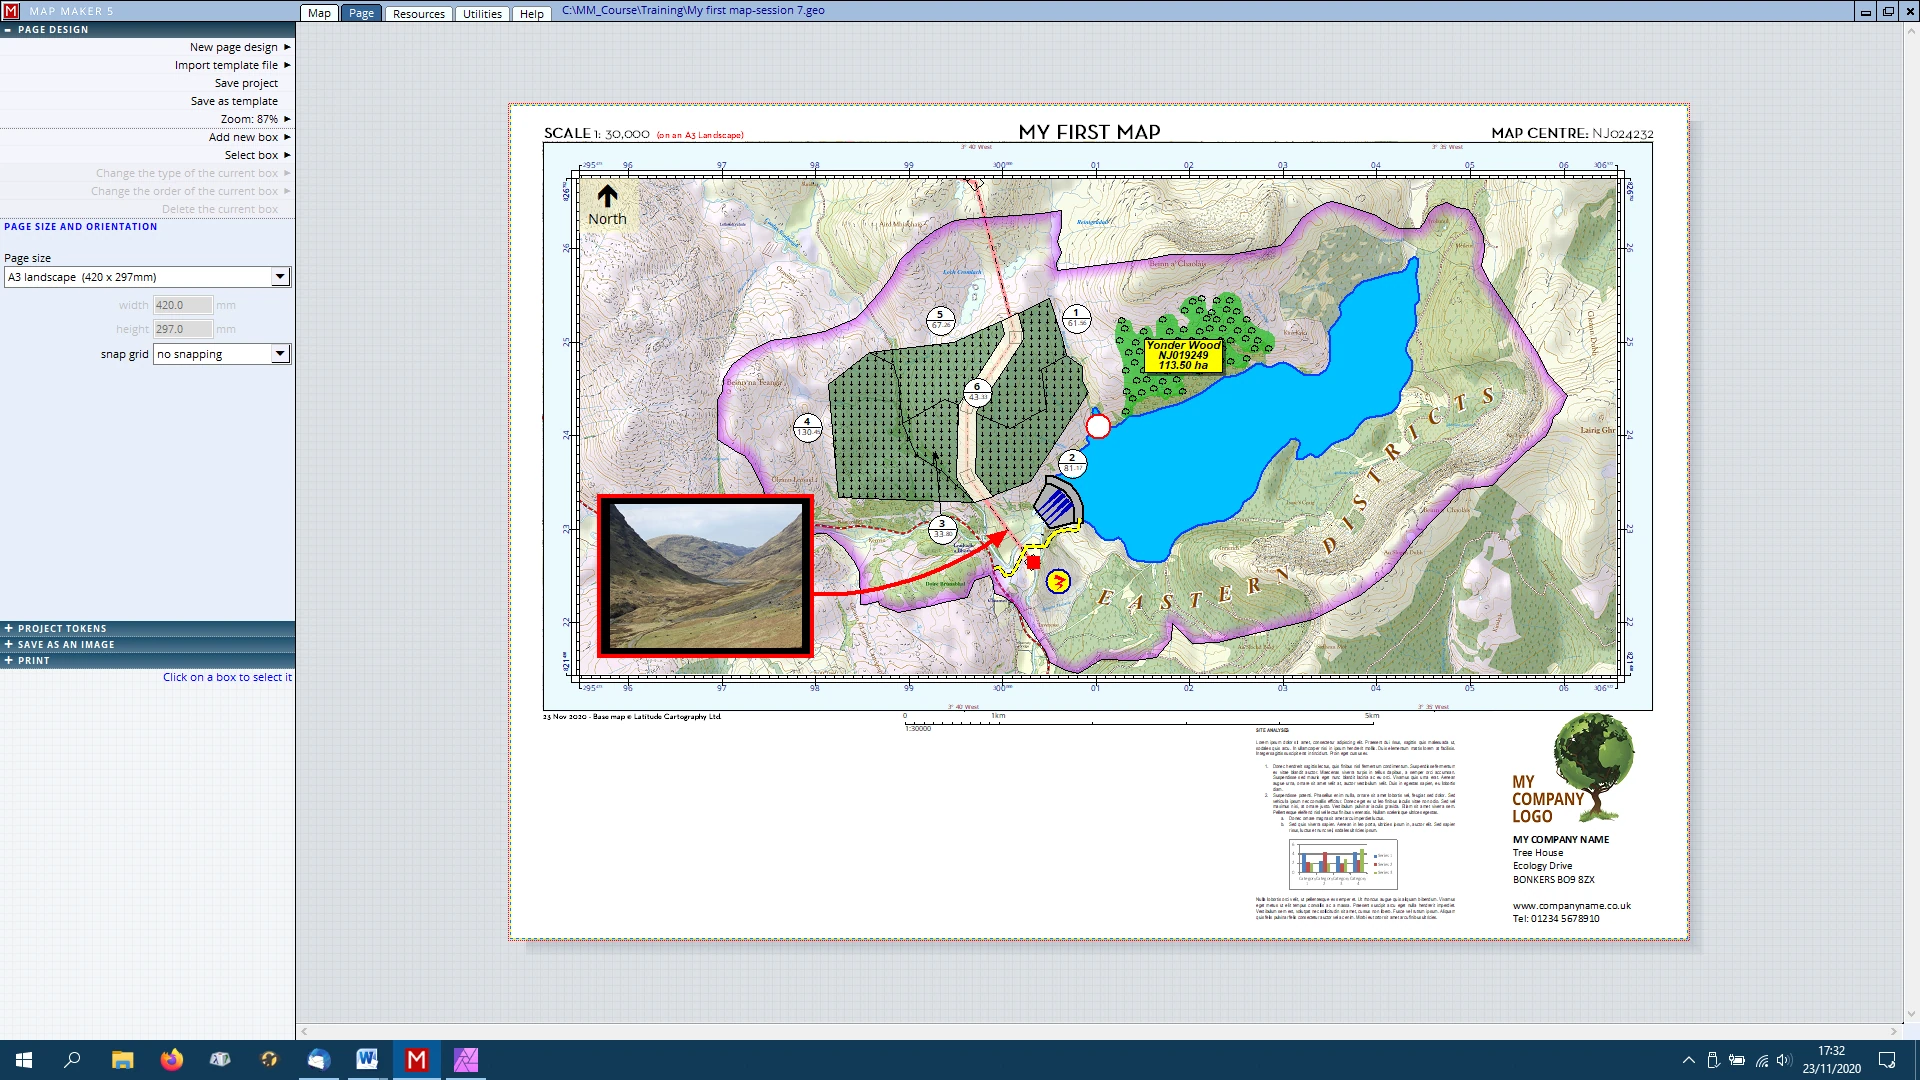
Move the panel to the empty space below the map and scale bar and resize it. Be aware that it can only show the first page of a document. Also note that the word document is automatically scaled to fit the box – this means that if it is a page filled from top to bottom the text may become rather small.
In other words, should we wish to make an intricate layout in MS Word to be used in a template, we need to plan ahead and know how large the document will be on the print so we can chose the right font sizes. Anchor this box to the bottom right.
F1 to save the project.
11.11 Changing Type, the Order and Deleting a box
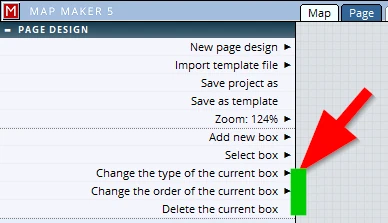
We can all read, but we would like to point it out:
Here we can change the type of the box, change the order they appear on screen (one over the other), and we can delete a box.